Tutorials

Change color based on a condition

Change color based on a condition #

Let’s say that you want to change the color of a Shape based on the status of the battery, so, for example, you want a shape to be yellow when the battery is discharging and green when charging, this can be done in many ways, so let’s start for the simplest example.

Simple color change #

  • Open the Advanced Editor and Create a Shape using the “+” on the top right
  • Change the Shape aspect according to your needs
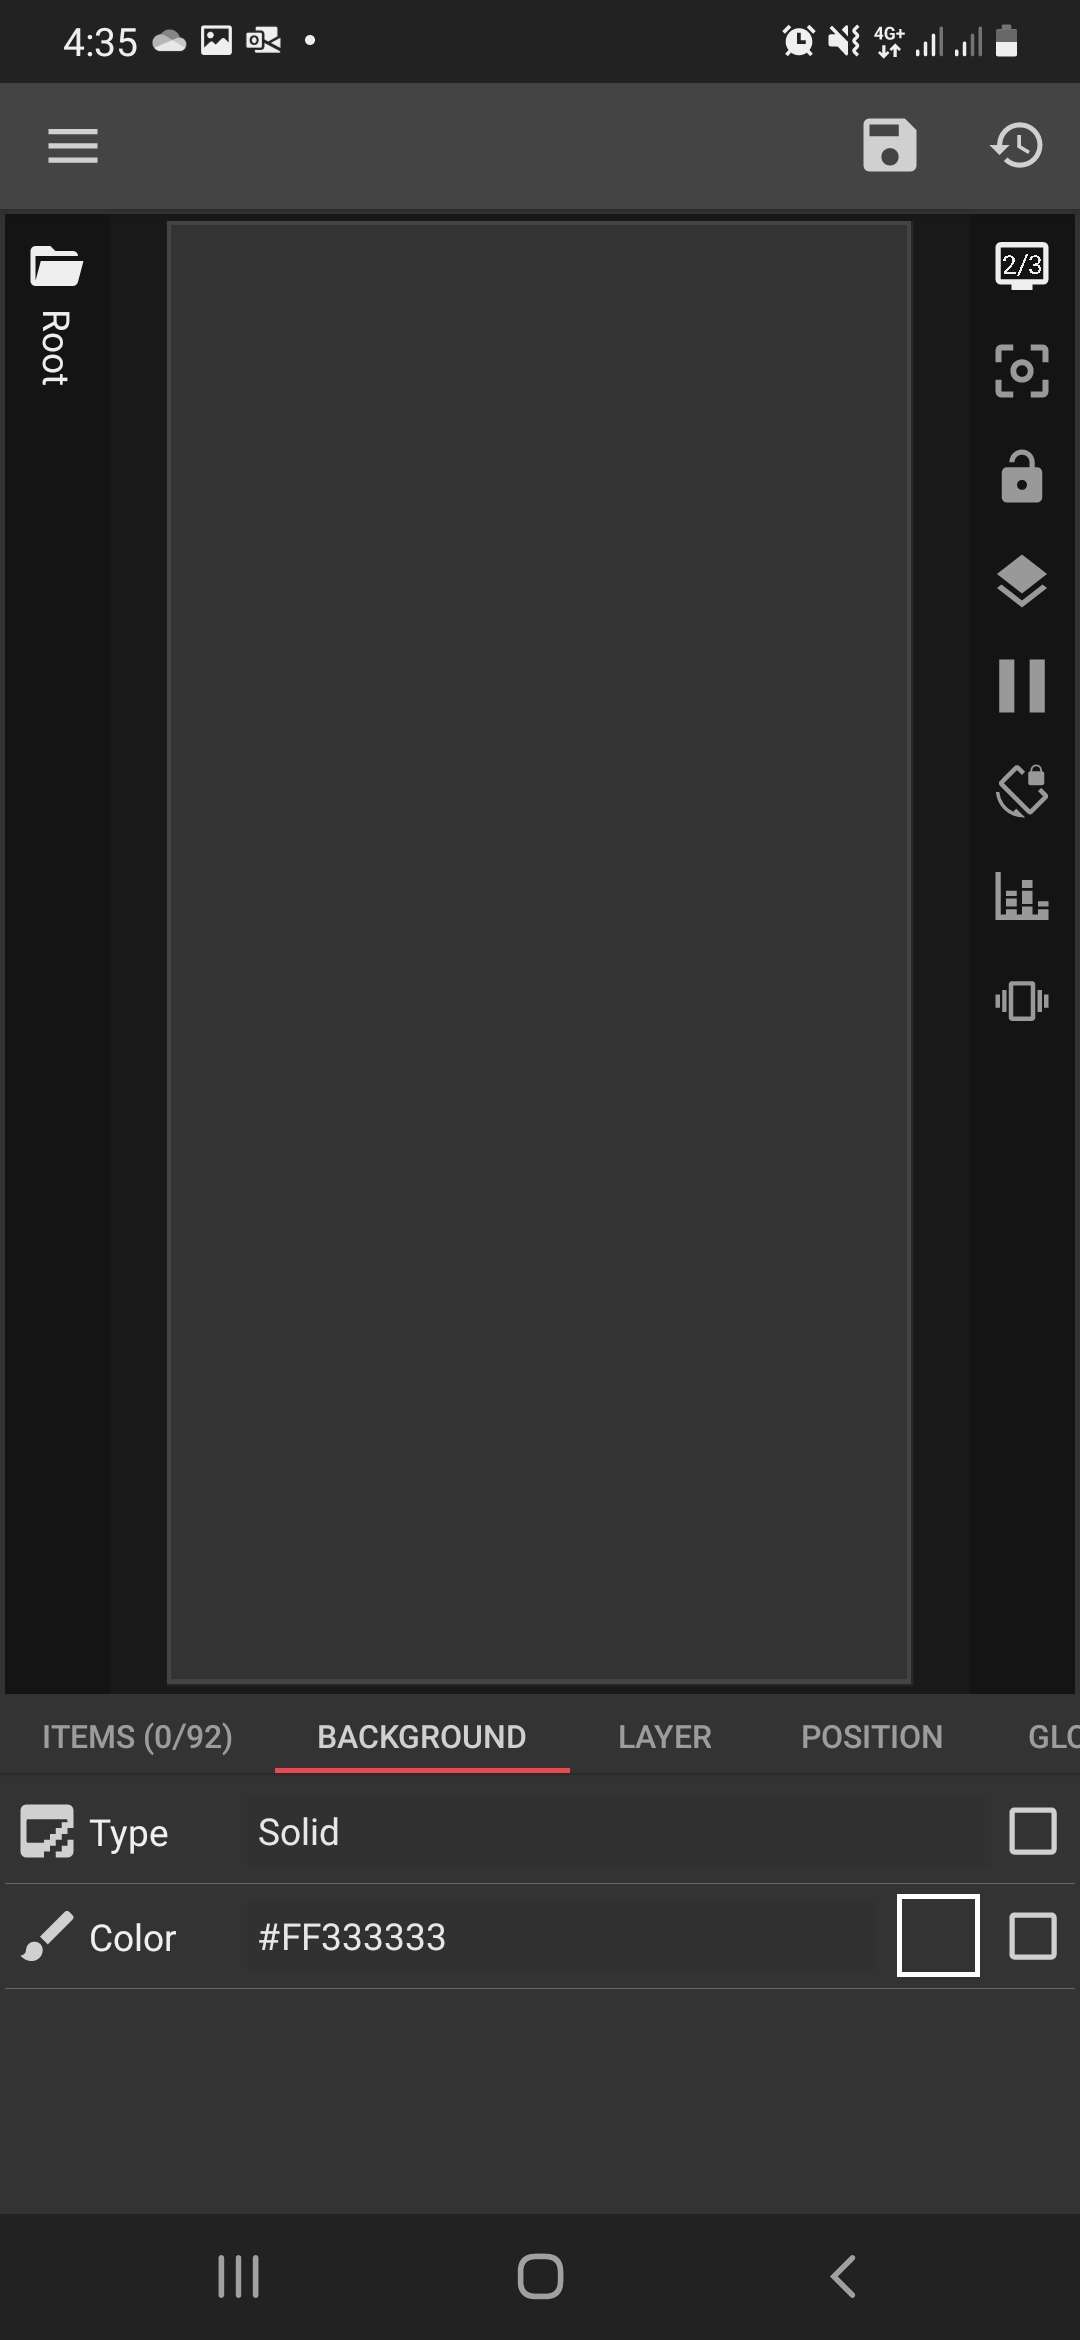
  • Go in the “Paint” section and select the color preference
  • On the top bar the “formula” icon will appear, select it
  • Now the preference has been switched to a “Formula” preference so it’s now controlled by an expression rather than a simple value, click the preference to edit the Formula
  • Type $if(bi(charging) = 0, #FFFF00, #00FF00)$ and press the “ok” button on top right
  • Done! Your shape will be #FFFF00 when battery is discharging and #00FF00 red otherwise

Color change with globals #

What if you want to change the color based on the battery status but also keep it easy to change those colors using the picker? Well, in this case you need to introduce the Globals, so:

...

Create a customizable pattern background

Create a customizable pattern background #

With Kustom is very very easy to create your own pattern based backgrounds by using the “tiling” function the the Overlap Group, let’s see how to setup a simple pattern with colors customizable via Globals. Steps are detailed just after the video.

Kustom: pattern background creation

Steps performed in the video:

  • Create two global colors, we call them “one” and “two”
  • Create an Overlap Group
  • We add to the group a background square, we switch color preference to a global by selecting it and clicking the “globe” and we select the “one” color
  • We add a small square inside and a circle on top left using global color “two” with the method above
  • We go back and we enable tiling with Layer -> Tiling 
  • We created our pattern background!
  • Finally we want to add some animations to make the pattern scrollable, we do that by using the “Animations -> Add” feature and we setup a scroll animation
  • Done, enjoy :)

Create a Font Icon pack

Create a Font Icon pack #

Kustom has a wonderful Font Icon module that allows you to easily add vector icons to your preset. Sometimes however builtin packs are not enough and you want to add your own, this is very easy, please follow these steps:

  • Go to the IcoMoon App site and create a new project (top right corner)
  • Add your icons and please pay attention to the license!
  • Once you are done adding icons press the “Generate Font” button (bottom right corner)
  • Give the icons the appropriate name (so just the text right to the icon, no need to change the code)
  • Finally press “download” (bottom right corner)
  • Copy the ttf font file inside the zip in /Internal storage/Kustom/icons/myfontpack.ttf
  • Copy the “selection.json” file inside the zip in /Internal storage/Kustom/icons/myfontpack.json
  • Please ensure that json and ttf files have the same name
  • You are done! Enjoy your icon pack!

If, in the future, you want to open this project again on IcoMoon site to add new icons just create a new project, press “import” and select the json file, this will load everything including the icons.

...

Create an Arc / Slice progress bar using a Shape

Create an Arc / Slice progress bar using a Shape #

Currently Kustom does not support Arcs or Slices in progress bars, so, in the meanwhile you need to use the following workaround:

  • Add an Arc shape or a Circle Slice shape
  • Go to FX and set Texture option to Sweep Gradient
  • Set width to 1, this will basically transform the shape in a flat progress bar
  • Now the “offset” option is your progress, select it, then press the calculator on top to use a formula
  • Enter any formula that goes from 0 to 100, so for example you can use $bi(level)$ for battery, or $100 / 60 * df(m)$ for minutes
  • Finally set colors properly and test

Floating Action Button tutorial

Floating Action Button tutorial #

Final result (full video tutorial at the end) #

Full KLWP preset with the final result can be downloaded in this XDA thread

Step 1: create the FAB button that will trigger the animation #

  • Start from an empty preset
  • Create a global that will be used to trigger the animations (Globals -> Add -> Type Switch), this global will be used to control animations around
  • Add the Image for the FAB, change its name to better see it in the list
  • Load an Image that you like, here i am using a generic “plus” button
  • Set single Touch action to “Global Switch” and pick the global we just defined (“FAB”), so when touching this image that global will be toggled on/off
  • Go to animations and add a new one, select “ReachOn -> Global Switch” so it will be triggered by the global switch, set speed to 5 to make it faster (5 is 50ms), set type to Rotate and amount to “63” so it will not rotate completely and stop a bit earlier looking like an “X” instead of a “+” (you can test the animation pressing the “play” button on top)
  • To make it a bit fancier add another animation triggered by the same global, set speed to 5 as above and select “Color Filter Out”, this will desaturate the image on click, making it black and white when opened
  • Your button is done! Save, go back to screen and see it in action. Cool eh?

Step 2: create app button #

  • Add another Image object, change its name to “Facebook” or whatever you want
  • Add a Switch animation of type Scroll so the Image will move when switch triggers, set speed at 5 as above, and play with “speed” and the “play” button on top right until you reach the desired result, set also the “angle” param if you want to change scroll direction and mode to “overshoot” if you want to bounce when opening
  • Add another Switch animation of type “Fade In” so the item will fade in when switch changes (and while fades), the item will disappear because its initial state will be invisible, if you click the play button you will see it become visible
  • Go back to the root and check with the global switch (changing it) if the animation is ok, if its ok change the position of the Facebook button and place it on top of the list so it will go below the FAB (so it will look like it appears from the back)
  • Done! Save and test it on screen

Step 3: create additional buttons #

  • Copy the facebook button using copy / paste
  • Change the name and the image (in this case we use Youtube)
  • Go to animations and change the scroll “speed” parameter to make it go farther, test it with play (you will just see an empty red rect because the item is transparent but it will be enough to tune speed
  • Save, done!

Video #

KLWP Floating Action Button Tutorial

...

How to edit kode from your desktop

How to edit kode from your desktop #

The limited screen real estate of mobile devices makes it a bit tricky to design a Kustom widget or theme. To get around this, you can use mirroring software so you can perform this task from your desktop with the full use of your keyboard and mouse.

Here are some recommended free tools from the community to achieve this,

Vysor #

Air Droid #

TeamViewer #

Instead of simply mirroring your phone, you can also use emulators and run Android itself from your desktop. Some options to do this are:

...

How to make scrollable theme in KLWP

How to make scrollable theme in KLWP. #

This tutorial will demonstrate how to create a basic 3-page scrollable live wallpaper in KLWP.

Empty theme

Requirements: #

  1. Launcher that supports wallpaper scrolling (eg. Nova Launcher)
  2. Enable wallpaper scrolling (Nova settings » Home screen » Enable “Wallpaper scrolling”)
  3. A background image that’s bigger than your screen

How to: #

  1. Open KLWP and start an empty theme
    Empty theme

  2. Go to the Background tab
    Empty theme

    ...

How to turn DND On/Off using Tasker

How to turn DND On/Off using Tasker #

Though it is currently not possible to manage DND with the Kustom app alone, with the help of Tasker, this can be achieved. This Tutorial can also be modified and used with other tasks that Tasker can perform.

First, create the necessary tasks in Tasker.

Turn on DND #

  1. Open Tasker
  2. Go to the TASKS tab
  3. Add a new task by tapping on the “+” button
  4. Enter the task name. Let’s call this “DND On”
  5. On the Task Edit page, tap on the “+” button to add an action
  6. Select Audio » Do Not Disturb
  7. Change the Mode value to “No Interruptions”
Tasker Turn On DND

Turn off DND #

  1. Open Tasker
  2. Go to the TASKS tab
  3. Add a new task by tapping on the “+” button
  4. Enter the task name. Let’s call this “DND Off”
  5. On the Task Edit page, tap on the “+” button to add an action
  6. Select Audio » Do Not Disturb
  7. Change the Mode value to “Allow All”
Tasker Turn On DND

Once you have the tasks created, you can start creating the KWGT Controls. For the sake of simplicity, we’ll just create two shapes. One, to turn on DND, and the other to turn it off.

...

Random wallpaper daily from reddit.com/r/EarthPorn

Random wallpaper daily from reddit.com/r/EarthPorn #

Lets say you want to get a nice random image from the wonderful sub reddit at https://reddit.com/r/EarthPorn

Nothing easier:

  • Start a blank preset
  • Go to the background tab
  • Select the bitmap property
  • Switch to a formula
  • Enter this formula: $tv(reg, wg("https://www.reddit.com/r/EarthPorn/.rss?refresh="+df(D), url, "i.redd.it", 0), "&.*", "")$

Save and done!

You can update this more frequently by changing for example df(D) to df(H) and it will be updated at the hour (if content changed)

...

Sharing simple modules via text

Sharing simple modules via text #

So you have created a wonderful signal indicator using shapes and you want all your friends to use it, right? Ok, let’s see how to share it via email / g+ / whatever.

Share #

  • Open the advanced editor
  • Select the module you want to share
  • Press the share icon on the action bar
  • Select your preferred app and send! As long as you do not change anything inside the ##KUSTOMCLIP## borders you can write anything you like.

Import #

  • Copy the entire message that has been shared with you (you do not need to copy only the ##KUSTOMCLIP## part, just copy everything, for example in G+ you can press the “copy text” option in the drop down menu)
  • Open Kustom, you will see a Toast saying that “clip has been imported”
  • You are done, you can now paste the item wherever you like

Limits #

  • Bitmaps, custom fonts or resources in general are not copied
  • Globals are currently not copied


Privacy Policy